Sunday, August 21, 2011

Assignment 2: Self Critique

Self Critique

In my opinion, I think my final animation turns out to be the exact same thing as my storyboard. However, I think that my animation is not very good. There were basic principles of animation introduced, such as squash & stretch ( the squash & stretch of the magnetic part of the arm ), anticipation ( the robotic arm anticipating its picking up of the box ) and ease in ease out ( the robotic arm picking up the boxes ). However, there were some cases where the principles could be introduced, but I didn't introduce them.

For instance, the boxes moving along the conveyor belt. I should have made them ease in and ease out, making the animation more natural instead of an abrupt stop.

Next, when I applied squash, there was a gap in between the joint of the arm end and the arm end itself. Naturally, when I applied stretch, part of the joint was also overridden by the arm end. This caused the animation too look abit more flimsy.

Also, when I was moving the boxes, I noticed that the first cargo box moves slightly. This might be an err on my part, since at one point of time I was having trouble with the parent constraints of my box object. I did not change the offsets properly.

There is also one part where when the robotic arm examines the cargo box, the arm end itself squashes a little. This is due to the squash that I have input in the next frame.

Assignment 2: Scenario 2

This is how I created my Robotic Arm animation.

Process

Using the rigged scene I have gotten from the previous exercise, I have started on my animation.

I then start with my first clip from my storyboard. The robot is busy stacking boxes.

The second clip of my storyboard. The robot goes on to pick up the box. I added a squash deformer so that it would fulfill the basic principle of animation - squash & stretch. The magnetic end of the arm will squash when it touches the box. It will then stretch after a few frames.

The third clip of my storyboard. The robot puts down the box that it picked up. I set the blend parent to 1 so that the box will move along with the arm. When the box is settled, I set the bledn parent back to 0 so that the arm would let go of the box.

The fourth clip of my storyboard. The robot first examines the box. It then gets suprised and then shakes its head in disapproval. I have made the swivel base move when the robot nodded so that it would look more natural and that the robot would look more alive.

The fifth clip of my storyboard. The robot goes on to pick up the box. I also added squash and stretch for this part. However, the squash and stretch is more vigorous now, since the robot pressed onto the box with more force.

The sixth clip of my storyboard. I then made the robot throw the box, by setting the blend parent of the box to 0 when the arm is near the edge. Then, I rotated and move the box, set keyframes so that the box would look like it was thrown.

The seventh clip of my storyboard. The robot will then spin around and around due to the force of the throw. I then set the swivel base to rotate a few times.

The last clip in my storyboard. I then made the robot look at the screen.

I then used the graph editor to make the animation more natural.

A few times that I had used graph editor include:

Making the ease in and ease out motion when the arm goes on to pick a box up.
Making the suprise motion after the arm examines the box.
Making the swing more natural by making it lose velocity the longer it spins.

After smoothing my animation, I playblasted it, using a resolution of 640 x 360.

This is the result of my Robotic Arm Animation:


Week 13 - IK Rigging

This is how I rigged my models so that I can prepare it for animation.

Process

First, I opened the Maya scene file that was provided to me. This scene would be used to do rigging and then be used for Assignment 2, which is the animation of my own robot arm.

First, I created joints at several points of the machine. I then opened the hypergraph and laid the layout stacked so that I can see the hypergraph and my animation at the same time.


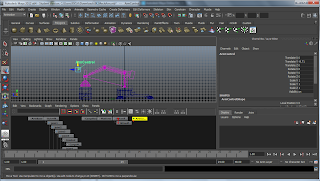
I then added an IK Handle and then set the hierarchy for the skeleton. As you can see here, all the joints and parts of the machine are now grouped together.

I then added an Arm Control locator so that it would be easier to move my machine around using that locator. I added an annotation to show what does the locator do.

I then set the rest position for the magnet part of the arm so that the magnet part of the arm would pick up the box properly.

I then parented the swivel base with the upper part of the mechanical arm. This is so that when my swivel base rotates, the mechanical arm moves together with it too, thus acting as a real swivel base.

I then set the limitations of the mechanical arm so that there is a maximum in which the arm can stretch and retract. Then, I collapsed all the elements in the hypergraph.

Next, I set parent constraints to the box so that when the mechanical arm moves, the box moves along with it. This can be adjusted by setting the blend parent of the box to either 1 or 0 to enable and disable the sticking.

This is the end result of my IK Rigging:


Techniques

This lab has prepared me for my upcoming assignment.

It also helps familiarize me with dealing with skeleton hierarchies, IK Handles and constraints.

Reflection

Overall, I think this exercise helped me alot and I learned alot.
However, One thing I like to note is how this is taught step by step. Since this is taught step by step, I might be familiar with this certain scene, but other scenes I have to figure them out for myself, which is quite hard.

However, If i just plainly followed what the instructions said, I would have never learnt anything. This gave me a lot of insight on what's to come for future animations.

References

Maya Autodesk Tutorials - Animation

Friday, August 5, 2011

Assignment 2: Storyboard

Scenario 2

Robot Name: Co-troller

Story: Co-troller is a robot built by a packaging factory to stack boxes for shipping. One day, Co-troller got fed up with his job and decide to rebel. He started to throw tantrums.

1) The robot is stacking boxes.

2) The robot bends down and starts to lift the box.

3) The robot then takes the box and puts it at its side. The next box moves forward.

4) The robot turns to the front. However, it shakes its head in disapproval.

5) The robot then picks up the next box. The boxes moves forward.

6) The robot then throws the box away.

7) The robot then turns around 360 degrees.

8) The robot comes to a stop and looks at the camera.